This is a follow up article of my previous article published here as CI/CD with GitHub Actions. There I was talking about basics of creating a GitHub action to automate project build and run tests.
In this article, I’ll be demonstrating a complete CI/CD to deploy a .net core web api project to Azure App Service.
Before jumping on creating a GitHub action to do so, first create a Azure App Service manually (as this is not part of this demonstration) with required configuration as per your .net project need.
Once Azure App Service has been created follow the below steps.
Step 1: Go to your Azure App Service Overview tab and download the publish profile from ‘Get publish profile’ option.

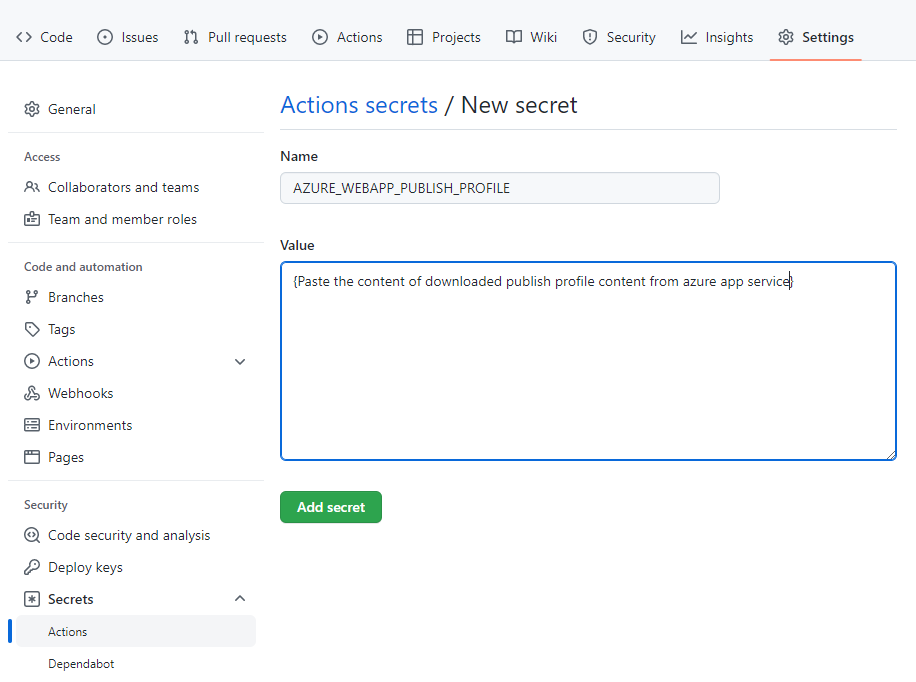
Step 2: Go to you GitHub project repo Settings tab and create a Action Secrets named as ‘AZURE_WEBAPP_PUBLISH_PROFILE’ and copy paste the entire content of downloaded publish profile file from Azure App Service in the value field.

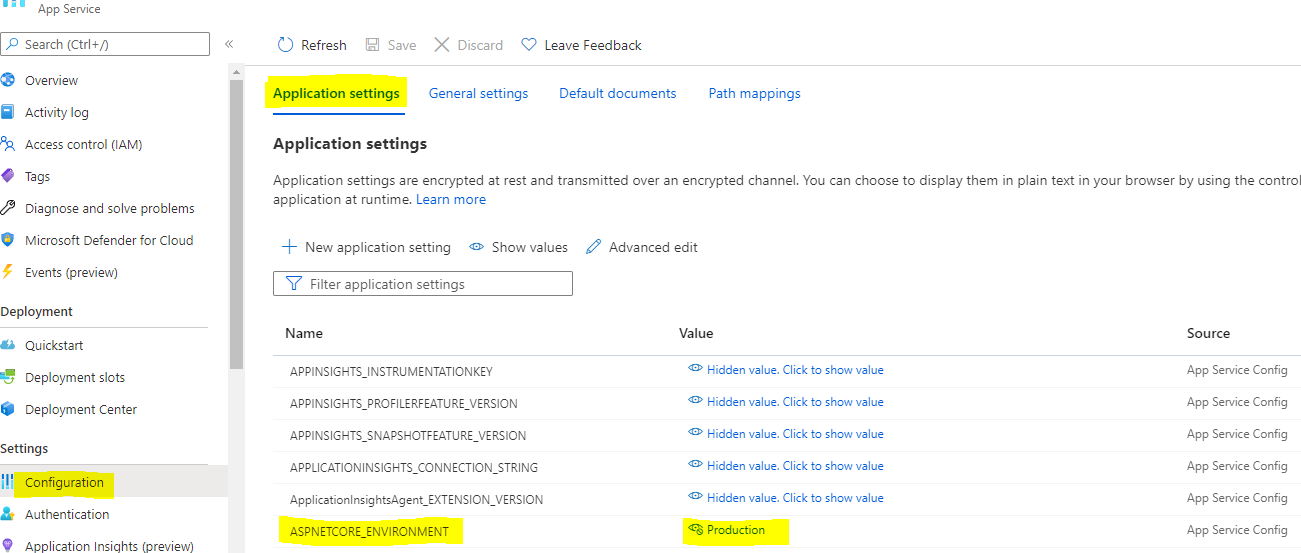
Step 3: Go back to your Azure App Service Configuration section and add a new Application Settings as

This is to tell the App Service to use appsettings.production.json from the build for app settings.
Step 4: From previous steps it is clear that, we will be using the appsettings.production.json file which contains the settings required for application.
As part of security and good practice, DO NOT hardcode the sensitive data in appsetting.production.json and instead use the tokenized string which will be replaced with correct value from the GitHub CI/CD process. i.e. connection string in appsetting file as:
"ConnectionStrings": {
    "ConnectionString": "#{ConnectionString}#",
  },
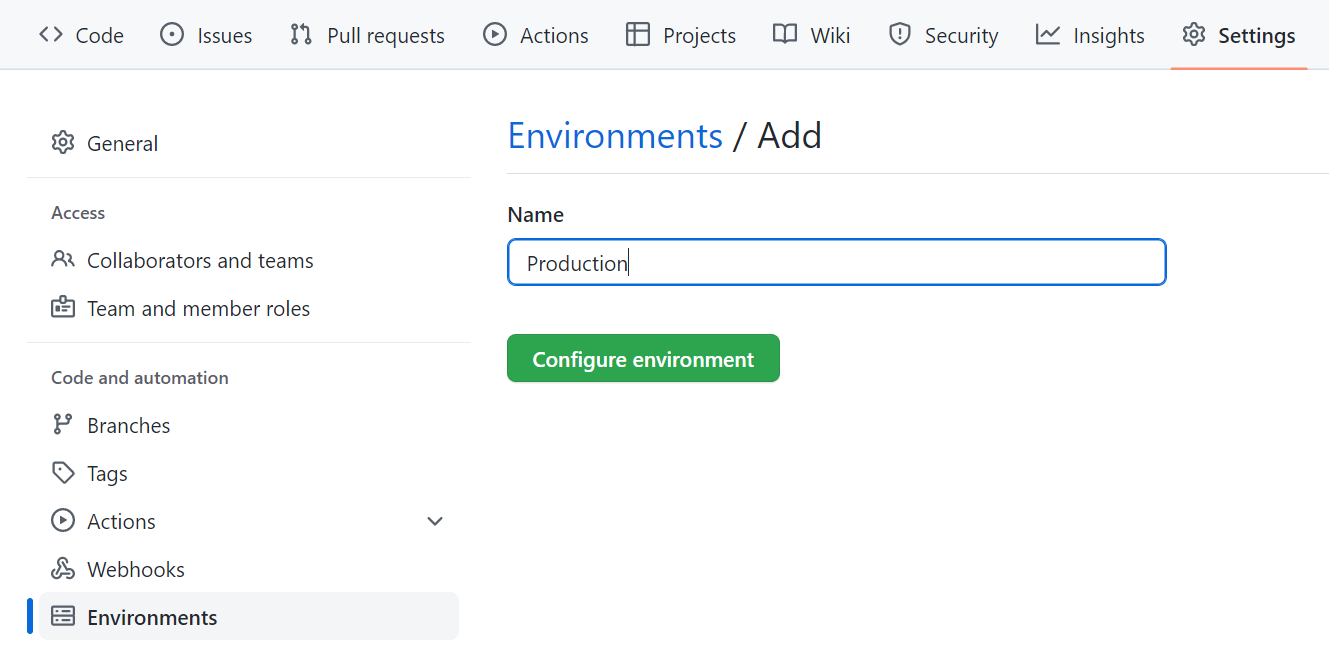
Step 5: Go to your project GitHub repository’s setting tab and create an Environment against which we will define our secrets like connectionString for prod environment.

Step 6: Go inside the create Environment and add secrets with name as “CONNETION_STRING” and in the value field, paste the connection string value required by your application.
Step 7: Create your .yml file and define the environment:Production to fetch secrets from prod environment (created in above step) and add a steps to detokenize your appsettings.production.json to replace connection string from secrets.
Note: Please follow my previous article if are new to GitHub Actions.
jobs:
  build:
    runs-on: windows-latest
    environment: Productionsteps:
      - uses: actions/checkout@v2

      - name: Replace token for appsettings.Production.json
        uses: cschleiden/replace-tokens@v1.1
        with:
          tokenPrefix: '#{'
          tokenSuffix: '}#'
          files: '["src/DemoAPI/appsettings.Production.json"]'
        env:
          ConnectionString: ${{secrets.CONNECTION_STRING}}
Make sure, you use the name of the token (left part) as part of env exactly as it is defined your appsetting.production.json. i.e. in my case it is #{ConnectionString}#, and value part (right side) will read the secrets using the key as defined, in my case it is CONNECTION_STRING.
Step 8: Now we will define steps to setup .net core, build project, publish project and finally upload artifacts for deployment as:
      - name: Set up .NET Core
        uses: actions/setup-dotnet@v1
        with:
          dotnet-version: ${{ env.DOTNET_VERSION }}
          #include-prerelease: true

      - name: Build projects
        run: |
          dotnet build src/DemoAPI/DemoAPI.sln --configuration Release

      - name: Publish Project
        run: |
          dotnet publish src/DemoAPI/DemoAPI.csproj -c Release -o ${{env.DOTNET_ROOT}}/myapp      - name: Upload artifact for deployment job
        uses: actions/upload-artifact@v2
        with:
          name: .net-app
          path: ./myapp
With these steps, our artifact (deployment packaged in zip format) is uploaded to github cloud server used in this build pipeline under ROOT/myapp folder.
Step 9: Add the next job to deploy the package to Azure App Service as:
deploy:
    runs-on: windows-latest
    needs: build
    environment:
      name: 'production'
      url: ${{ steps.deploy-to-webapp.outputs.webapp-url }}   steps:
      - name: Download artifact from build job
        uses: actions/download-artifact@v3
        with:
          name: .net-app
          path: upload_artifact      - name: Deploy to Azure Web App
        id: deploy-to-webapp
        uses: azure/webapps-deploy@v2
        with:
          app-name: 'DemoAPI'
          slot-name: 'production'
          publish-profile: ${{ secrets.AZURE_WEBAPP_PUBLISH_PROFILE }}
          package: upload_artifact
As part of deploy job, the first step is for downloading the artifact and key thing to take care of is, the name: .net-app should be exactly same as you defined the name while uploading artifact steps from build job.
and the second step is for, deploying the app to Azure App Service (we created) and the key things to notice here are the package name, should be exactly same as you define as part of path in previous step, and second thing is publish-profile value reading correct secrets to connect to Azure App Service (which is downloaded publish profile details).
And we are done.
Hope you enjoyed the content, follow me for more like this and please don’t forget to like/comment for it. Happy programming.
No comments:
Post a Comment